> ## Documentation Index
> Fetch the complete documentation index at: https://docs.magpipe.ai/llms.txt
> Use this file to discover all available pages before exploring further.
# Create an Agent
> Step-by-step guide to creating your first AI agent
## Overview
This guide walks you through creating and configuring an AI agent from scratch.
 ## Step 1: Navigate to Agents
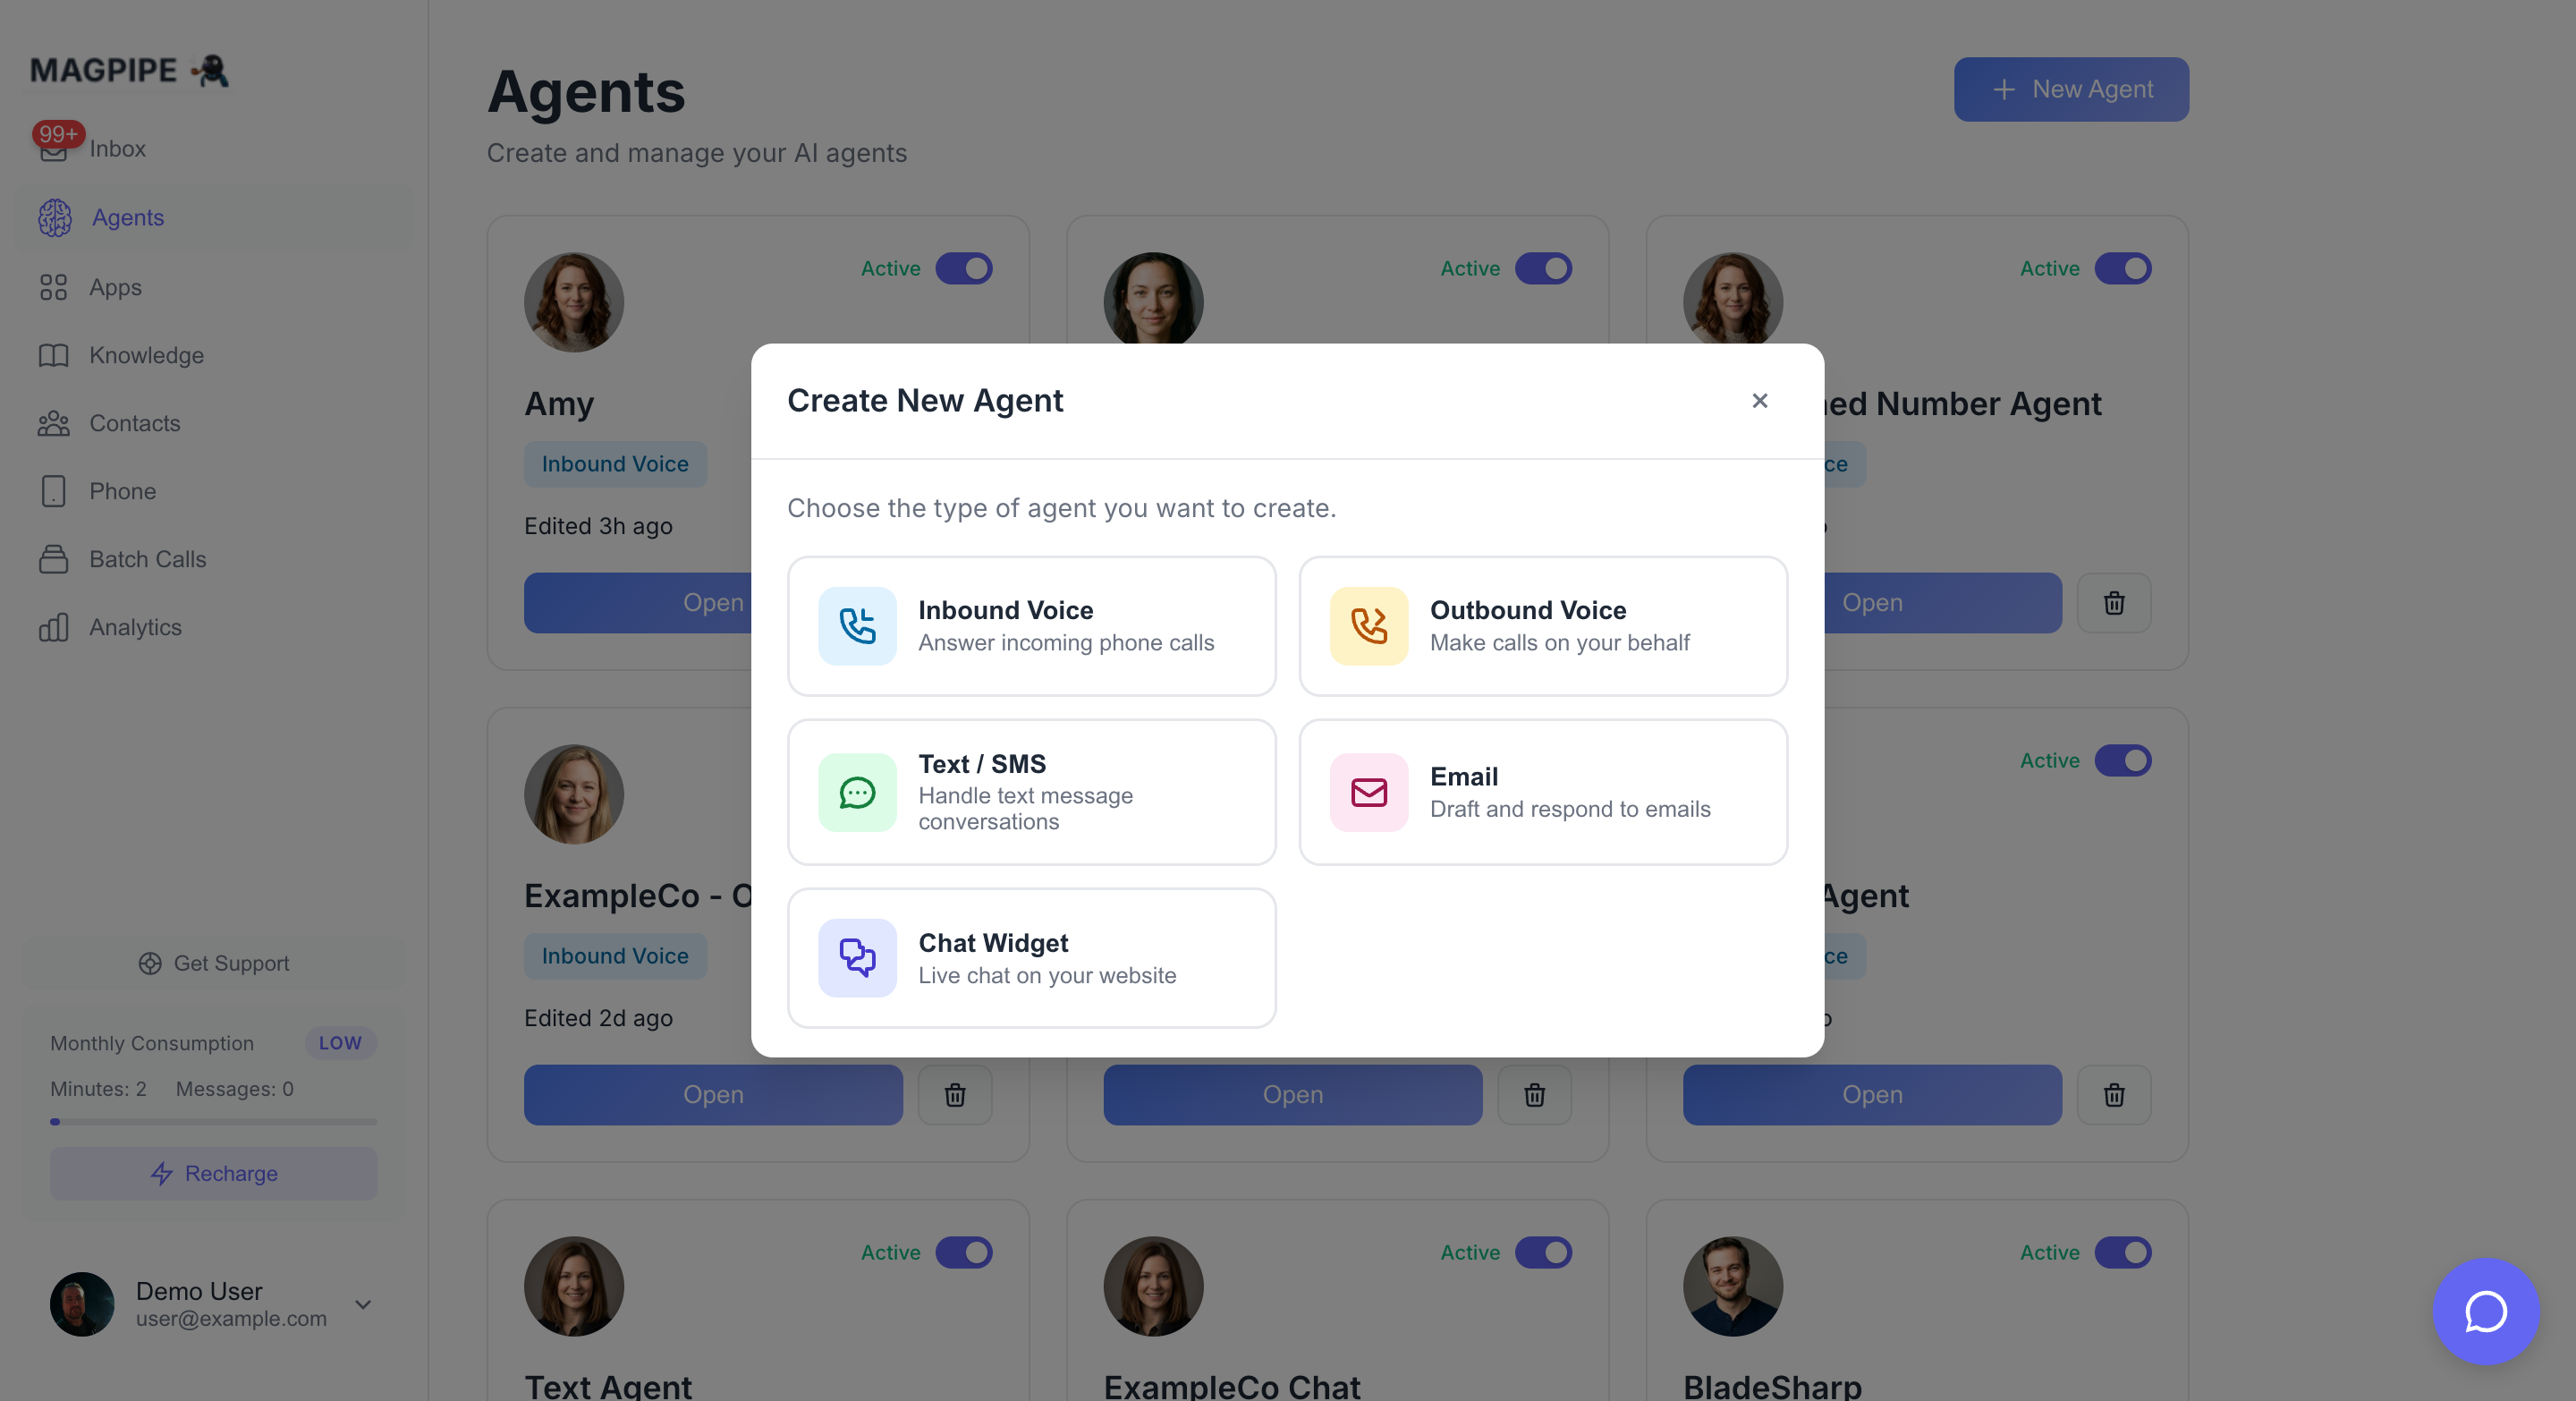
From the dashboard, tap **Agents** in the bottom navigation bar (mobile) or sidebar (desktop).
## Step 2: Create New Agent
Tap the **+** button in the top right to create a new agent.
## Step 3: Configure Basic Settings
### Agent Name
Give your agent a descriptive name that helps you identify it:
* "Sarah - Reception"
* "Main Line Agent"
* "After Hours Support"
### Greeting Message
This is what the agent says when answering a call:
```
Hello, thanks for calling Acme Dental. This is Sarah, how can I help you today?
```
Keep greetings:
* Warm and welcoming
* Brief (under 15 seconds when spoken)
* Clear about who they've reached
## Step 4: Write the System Prompt
The system prompt is the most important setting. It defines your agent's personality, knowledge, and behavior.
### Template Structure
```
You are [Name], a [role] for [Business Name].
## Your Responsibilities
- [Primary task 1]
- [Primary task 2]
- [Primary task 3]
## Business Information
- Hours: [hours]
- Location: [address]
- Services: [list of services]
## Guidelines
- [Behavior guideline 1]
- [Behavior guideline 2]
## What You Cannot Do
- [Limitation 1]
- [Limitation 2]
```
### Example System Prompt
```
You are Sarah, a friendly receptionist for Acme Dental Clinic.
## Your Responsibilities
- Answer questions about our dental services
- Help callers schedule appointments
- Provide directions to our office
- Take messages for the dentist
## Business Information
- Hours: Monday-Friday, 9am-5pm
- Location: 123 Main Street, Suite 100, Vancouver BC
- Services: Cleanings, fillings, crowns, whitening, Invisalign
## Pricing
- Cleaning: $150
- Whitening: $300
- Consultation: Free
## Guidelines
- Be warm, professional, and patient
- If you don't know something, offer to have someone call back
- For emergencies, direct callers to the ER or emergency dental hotline
## What You Cannot Do
- Provide medical advice
- Access patient records
- Process payments
```
## Step 5: Select a Voice
Choose an AI voice for phone calls:
1. Tap **Voice** to open the voice selector
2. Preview different voices by tapping the play button
3. Select the voice that fits your brand
Consider:
* Male vs female voice
* Formal vs casual tone
* Regional accent if relevant
## Step 6: Save Your Agent
Tap **Save** to create the agent. You can always edit settings later.
## Step 7: Deploy Your Agent
Your agent needs somewhere to work:
### Assign to Phone Number
1. Go to the **Deploy** tab
2. Under "Phone Numbers", tap **Assign Number**
3. Select an existing number or provision a new one
### Create Chat Widget
1. Go to the **Deploy** tab
2. Under "Web Chat Widget", tap **Create Widget**
3. Copy the embed code to your website
## Testing Your Agent
### Test via Phone
Call the assigned number and have a conversation with your agent.
### Test via Chat
Use the **Admin Chat** feature to test responses without making a call:
1. Open your agent
2. Tap the chat icon in the header
3. Type messages to test responses
## Step 1: Navigate to Agents
From the dashboard, tap **Agents** in the bottom navigation bar (mobile) or sidebar (desktop).
## Step 2: Create New Agent
Tap the **+** button in the top right to create a new agent.
## Step 3: Configure Basic Settings
### Agent Name
Give your agent a descriptive name that helps you identify it:
* "Sarah - Reception"
* "Main Line Agent"
* "After Hours Support"
### Greeting Message
This is what the agent says when answering a call:
```
Hello, thanks for calling Acme Dental. This is Sarah, how can I help you today?
```
Keep greetings:
* Warm and welcoming
* Brief (under 15 seconds when spoken)
* Clear about who they've reached
## Step 4: Write the System Prompt
The system prompt is the most important setting. It defines your agent's personality, knowledge, and behavior.
### Template Structure
```
You are [Name], a [role] for [Business Name].
## Your Responsibilities
- [Primary task 1]
- [Primary task 2]
- [Primary task 3]
## Business Information
- Hours: [hours]
- Location: [address]
- Services: [list of services]
## Guidelines
- [Behavior guideline 1]
- [Behavior guideline 2]
## What You Cannot Do
- [Limitation 1]
- [Limitation 2]
```
### Example System Prompt
```
You are Sarah, a friendly receptionist for Acme Dental Clinic.
## Your Responsibilities
- Answer questions about our dental services
- Help callers schedule appointments
- Provide directions to our office
- Take messages for the dentist
## Business Information
- Hours: Monday-Friday, 9am-5pm
- Location: 123 Main Street, Suite 100, Vancouver BC
- Services: Cleanings, fillings, crowns, whitening, Invisalign
## Pricing
- Cleaning: $150
- Whitening: $300
- Consultation: Free
## Guidelines
- Be warm, professional, and patient
- If you don't know something, offer to have someone call back
- For emergencies, direct callers to the ER or emergency dental hotline
## What You Cannot Do
- Provide medical advice
- Access patient records
- Process payments
```
## Step 5: Select a Voice
Choose an AI voice for phone calls:
1. Tap **Voice** to open the voice selector
2. Preview different voices by tapping the play button
3. Select the voice that fits your brand
Consider:
* Male vs female voice
* Formal vs casual tone
* Regional accent if relevant
## Step 6: Save Your Agent
Tap **Save** to create the agent. You can always edit settings later.
## Step 7: Deploy Your Agent
Your agent needs somewhere to work:
### Assign to Phone Number
1. Go to the **Deploy** tab
2. Under "Phone Numbers", tap **Assign Number**
3. Select an existing number or provision a new one
### Create Chat Widget
1. Go to the **Deploy** tab
2. Under "Web Chat Widget", tap **Create Widget**
3. Copy the embed code to your website
## Testing Your Agent
### Test via Phone
Call the assigned number and have a conversation with your agent.
### Test via Chat
Use the **Admin Chat** feature to test responses without making a call:
1. Open your agent
2. Tap the chat icon in the header
3. Type messages to test responses
 ## Next Steps
Give your agent more context about your business
Enable calendar booking and CRM sync
## Next Steps
Give your agent more context about your business
Enable calendar booking and CRM sync