Overview
Custom Functions allow you to extend your AI agent’s capabilities by defining webhooks it can call during conversations. This enables real-time integration with your CRM, order systems, appointment schedulers, databases, and any other external service. When a caller asks for information your agent doesn’t have (like order status, account balance, or inventory availability), the agent can call your webhook to fetch that data and respond naturally.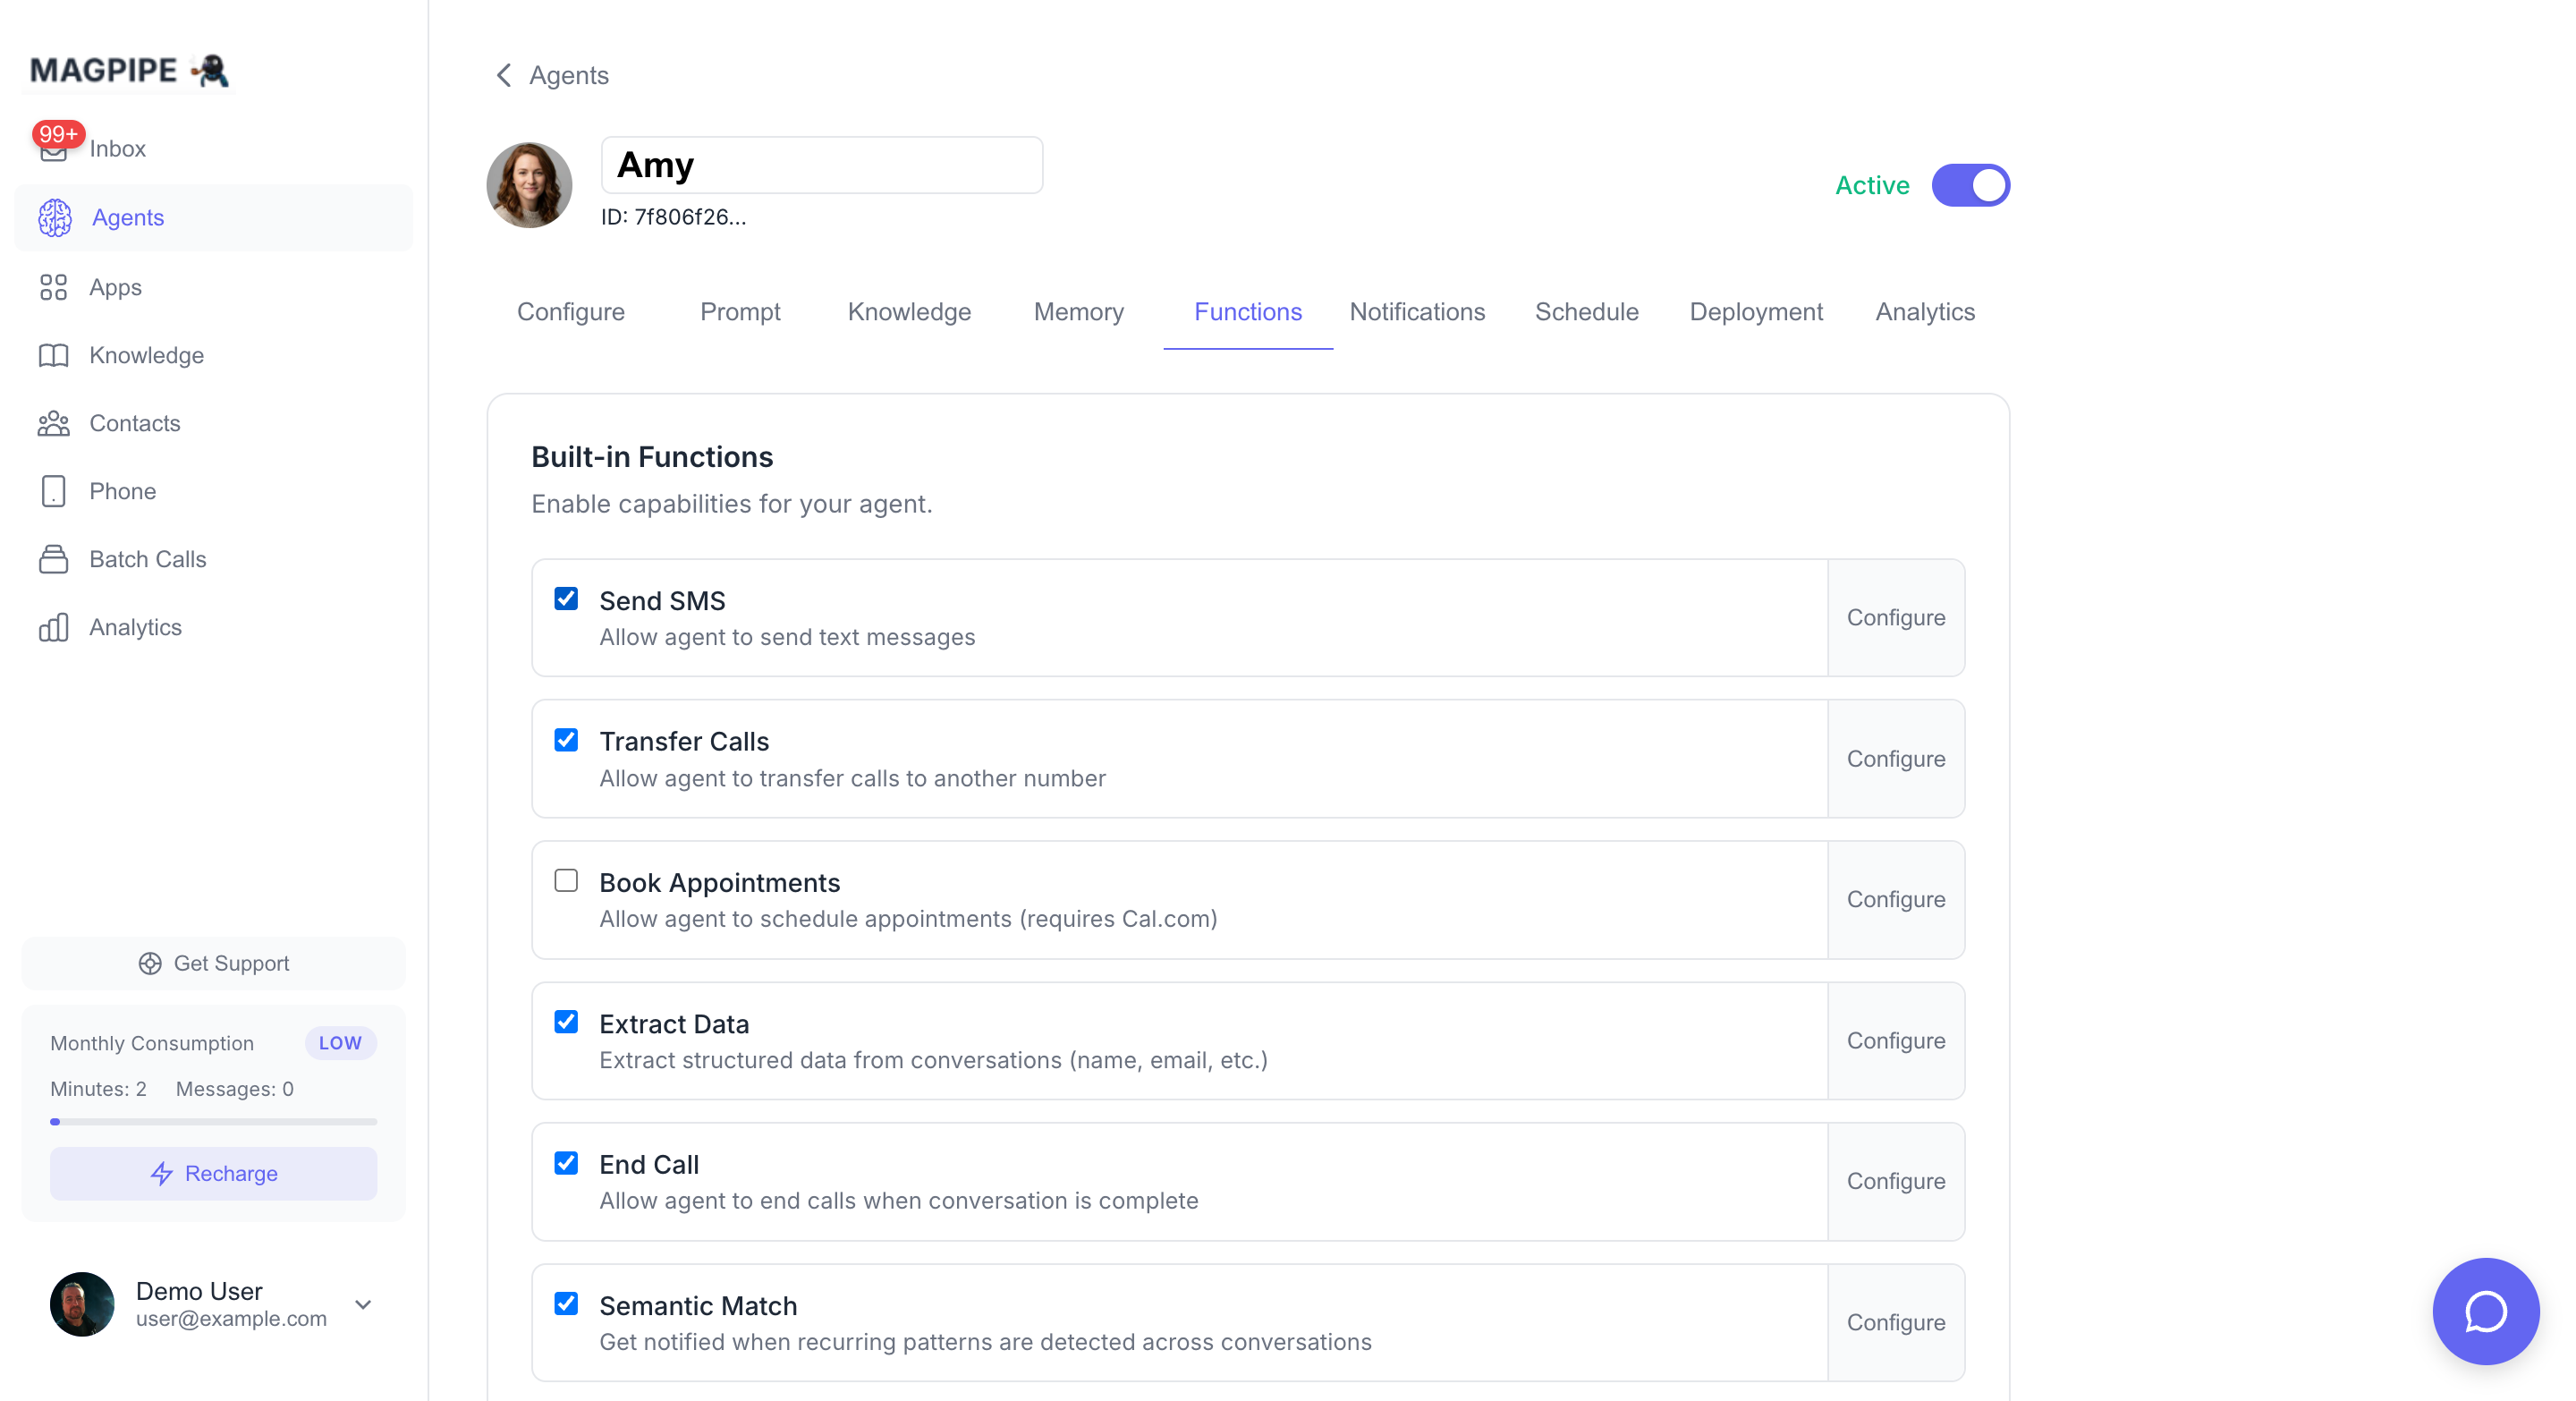
How It Works
Creating a Custom Function
Configure Basic Info
- Function Name: Use snake_case (e.g.,
check_order_status) - Description: Explain what it does - the AI uses this to decide when to call it
Set HTTP Configuration
- Method: GET, POST, PUT, PATCH, or DELETE
- Endpoint URL: Your webhook URL (must be HTTPS)
Define Parameters
Add parameters the AI should collect from the conversation:
- Name (snake_case)
- Type (string, number, boolean)
- Description (helps AI understand what to collect)
- Required (must be provided before calling)
Configuration Options
Basic Info
| Field | Description | Example |
|---|---|---|
| Name | Function identifier (snake_case) | check_order_status |
| Description | What the function does (AI reads this) | “Look up customer order status by order ID” |
HTTP Configuration
| Field | Description |
|---|---|
| Method | HTTP method (GET, POST, PUT, PATCH, DELETE) |
| Endpoint URL | Your webhook URL (must be HTTPS in production) |
Headers
Add custom headers to include with requests:| Header | Value | Use Case |
|---|---|---|
Authorization | Bearer your-api-key | API authentication |
X-API-Key | your-key | Alternative auth |
Content-Type | application/json | Usually automatic |
Parameters
Define what information the AI should collect before calling:| Field | Description |
|---|---|
| Name | Parameter name (snake_case) |
| Type | string, number, or boolean |
| Description | What this parameter represents |
| Required | Must be collected before calling |
Response Variables
Extract specific values from the webhook response using JSON paths:| Field | Description |
|---|---|
| Name | Variable name for the extracted value |
| JSON Path | Path to the value (e.g., $.data.status) |
status→$.data.statustracking→$.data.tracking_numbereta→$.data.eta
Advanced Settings
| Setting | Default | Description |
|---|---|---|
| Timeout | 120000ms | Maximum time to wait for response |
| Max Retries | 2 | Number of retry attempts on failure |
Example Functions
Order Status Lookup
Account Balance Check
Appointment Availability
Webhook Implementation
Request Format
Your webhook receives a POST request (or specified method) with: Headers:session_id is a unique identifier for the current conversation session. channel_type indicates how the customer is communicating — "call", "sms", or "chat". Both are automatically injected by the agent alongside your defined parameters.
On messaging channels (WhatsApp/SMS), the agent injects a few more server-known fields so your function can capture things the model can’t reliably supply on its own:
from— the contact’s phone number.images/media_urls— present only when the contact sent photos in the current session. Both hold the same array of re-hosted, time-limited signed URLs (valid ~1 year) you canGETdirectly with no credentials. The model can’t see image content, so these are attached automatically — you don’t (and shouldn’t) ask the model for them.
Response Format
Return a JSON response:Verifying Request Signatures
For security, verify that requests come from Magpipe:Request signing is optional but recommended for production. Set the
CUSTOM_FUNCTION_WEBHOOK_SECRET environment variable on the agent server to enable signing.Best Practices
Function Design
Write Clear Descriptions
Write Clear Descriptions
The AI uses your description to decide when to call the function. Be specific:Good: “Look up customer order status by order ID. Returns shipping status, tracking number, and estimated delivery date.”Bad: “Get order info”
Use Descriptive Parameter Names
Use Descriptive Parameter Names
Help the AI understand what to collect:Good:
order_confirmation_number, customer_emailBad: id, dataMark Required Parameters
Mark Required Parameters
Only mark parameters as required if the function truly can’t work without them. Optional parameters give flexibility.
Handle Errors Gracefully
Handle Errors Gracefully
Return clear error messages so the AI can explain issues to callers:
Webhook Implementation
Respond Quickly
Respond Quickly
Keep webhook response times under 5 seconds. The AI waits for the response before continuing the conversation. Long delays feel unnatural.
Return Useful Data
Return Useful Data
Return data in a format the AI can naturally speak:Good:
"status": "Your order shipped yesterday and will arrive by Friday"Okay: "status": "SHIPPED", "eta": "2024-01-15"Validate Inputs
Validate Inputs
Validate all input parameters. Don’t assume the AI will always send perfect data.
Use HTTPS
Use HTTPS
Always use HTTPS endpoints in production for security.
Testing
Using Webhook.site
For testing without building a server:- Go to webhook.site
- Copy your unique URL
- Use it as your endpoint URL
- Make a test call and ask the AI to trigger the function
- See the request in webhook.site
Test Conversation
After creating a function, test it:- Call your agent’s phone number
- Ask something that should trigger the function
- Verify the webhook receives the request
- Confirm the AI speaks the response correctly
“Hi, I’d like to check on my order. The order number is 12345.”
Troubleshooting
Function Not Being Called
Function Not Being Called
- Check the function description - is it clear when to use it?
- Verify the function is set to “Active”
- Make sure required parameters match what the caller might say
Webhook Not Receiving Requests
Webhook Not Receiving Requests
- Verify the endpoint URL is correct and accessible
- Check that HTTPS is working (no certificate errors)
- Look for firewall or network issues
AI Not Speaking Response
AI Not Speaking Response
- Check webhook response format (must be valid JSON)
- Verify response variables have correct JSON paths
- Ensure response is returned within timeout
Invalid Signature Errors
Invalid Signature Errors
- Verify webhook secret matches on both ends
- Check timestamp format (Unix seconds)
- Ensure payload isn’t modified before verification
Authentication Headers Not Being Sent
Authentication Headers Not Being Sent
If your endpoint is returning 401 errors, verify that headers are configured in the Functions tab for your agent. Headers like
Authorization or x-api-key must be set there — they are not inherited from anywhere else.Limits
| Plan | Custom Functions per Agent |
|---|---|
| Starter | 3 |
| Pro | 10 |
| Enterprise | Unlimited |
API Reference
Create functions via API
Apps & Integrations
Pre-built integrations